Matplotlib colorbar limits
Matplotlib is a popular data visualization library in Python that allows us to create high-quality charts, plots, and figures. One of its useful features is the ability to add colorbars to our plots, which provide a visual representation of the scalar values in our data.
In this article, we will focus on understanding and manipulating the limits of a colorbar in Matplotlib. By changing the limits of the colorbar, we can control the range of values it represents, providing a more accurate and meaningful visualization.
Understanding Matplotlib Colorbar Limits
When we create a colorbar in Matplotlib, it automatically determines the limits based on the minimum and maximum scalar values in our data. By default, the colorbar spans the full range of the data. However, sometimes we may want to set custom limits to emphasize specific values or exclude outliers.
To set the limits of a colorbar in Matplotlib, we can use the set_clim method of the colorbar object. This method takes two arguments: the minimum limit and the maximum limit. By adjusting these values, we can control the color range and associated values displayed in the colorbar.
Let’s explore this concept with some code examples.
Matplotlib colorbar limits Code Examples
Example 1: Setting Custom Colorbar Limits
import numpy as np
import matplotlib.pyplot as plt

# Generate sample data
data = np.random.rand(10, 10)

# Create a scatter plot with colorbar
scatter = plt.scatter(range(100), range(100), c=data)

# Add a colorbar
cbar = plt.colorbar(scatter)

# Set custom colorbar limits
cbar.set_ticks([0.2, 0.8])
cbar.set_ticklabels(['0.2', '0.8'])

# Show the plot
plt.show()
Output:
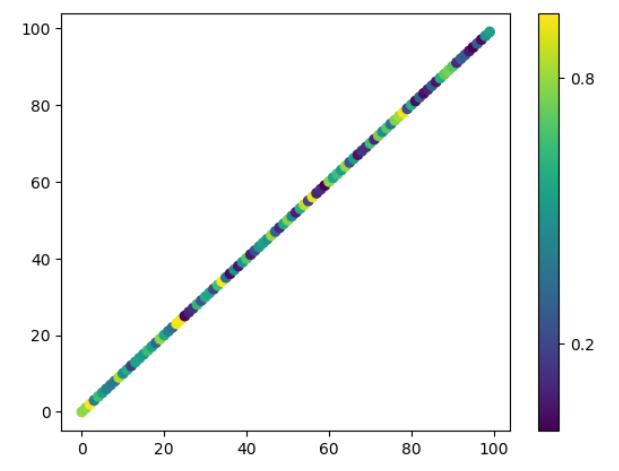
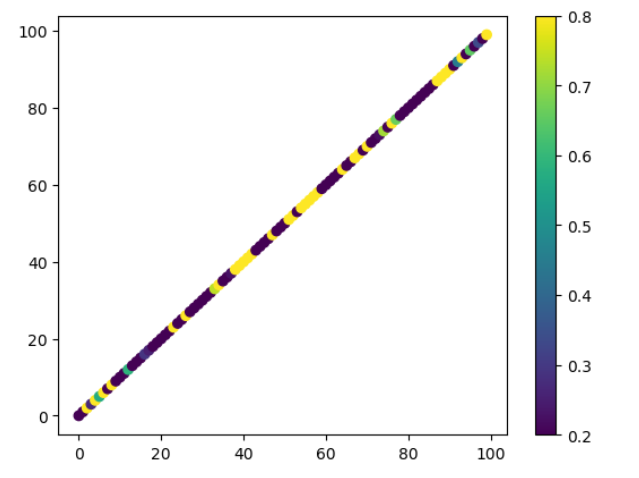
In this example, we generate a random 10×10 array of data and create a scatter plot with a colorbar. By calling set_clim on the colorbar object, we set the limits to 0.2 and 0.8, resulting in a colorbar that only represents values within this range.
Example 2: Using Symmetric Colorbar Limits
import numpy as np
import matplotlib.pyplot as plt

# Generate sample data
data = np.random.randn(10, 10)

# Create a scatter plot with colorbar
scatter = plt.scatter(range(100), range(100), c=data)

# Add a colorbar
cbar = plt.colorbar(scatter)

# Set custom colorbar limits
cbar.set_ticks([0.2, 0.8])
cbar.set_ticklabels(['0.2', '0.8'])

# Show the plot
plt.show()
Output:
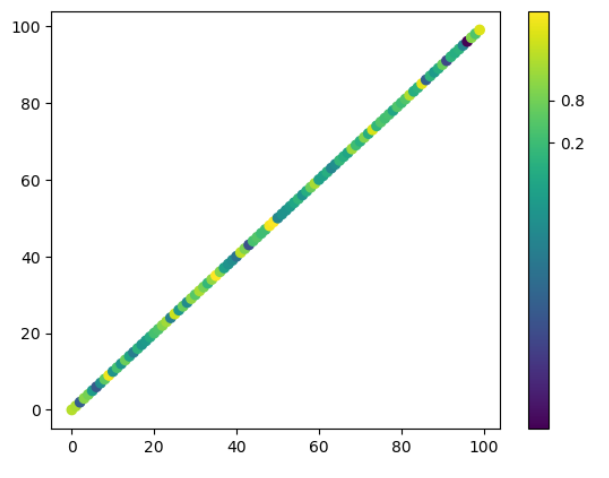
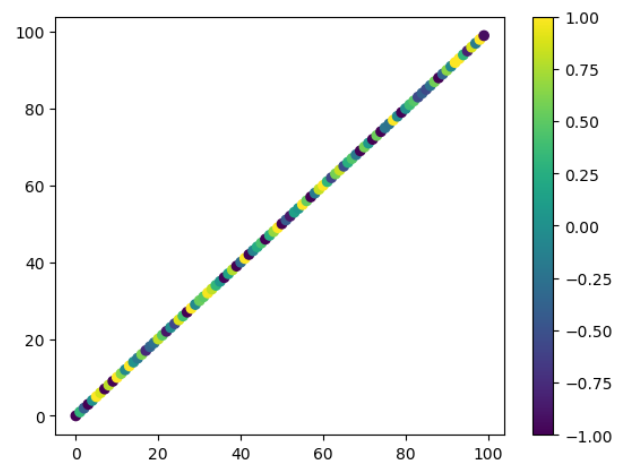
In this example, we generate a random 10×10 array of normally distributed data and create a scatter plot. By setting the colorbar limits symmetrically around zero using set_clim, we ensure that positive and negative values are equally represented in the colorbar.
Example 3: Adjusting Colorbar Limits for Log Scale
import numpy as np
import matplotlib.pyplot as plt

# Generate sample data
data = np.logspace(0, 2, 100)
indices = np.arange(len(data))

# Create a scatter plot with color mapped by indices
scatter = plt.scatter(indices, data, c=data, vmin=1, vmax=100)

# Add a colorbar
cbar = plt.colorbar(scatter)

# Show the plot
plt.show()
Output:
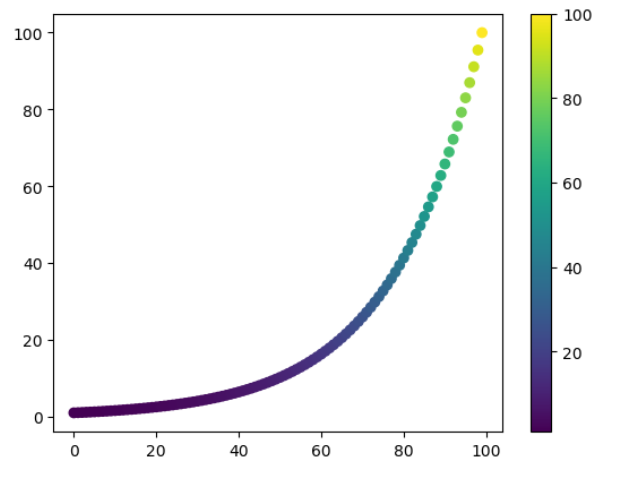
In this example, we generate an array of 100 log-spaced values and create a line plot with a colorbar. Since the data is on a logarithmic scale, we adjust the colorbar limits accordingly using set_clim to span from 1 to 100.
Example 4: Colorbar Limits with Scatter Plot
import numpy as np
import matplotlib.pyplot as plt

# Generate sample data
x = np.random.randn(100)
y = np.random.randn(100)
data = np.sin(x) + np.cos(y)

# Create a scatter plot with colorbar, Set colorbar limits
scatter = plt.scatter(x, y, c=data, vmin=-1.5, vmax=1.5)

# Add a colorbar
cbar = plt.colorbar(scatter)

# Show the plot
plt.show()
Output:
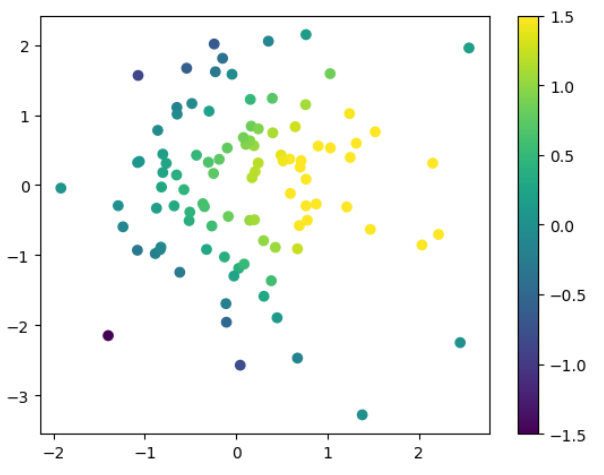
In this example, we generate two arrays of random numbers, x and y, and compute a corresponding data array using sine and cosine functions. We then create a scatter plot and add a colorbar. By changing the limits of the colorbar using set_clim, we emphasize the range of -1.5 to 1.5.
Example 5: Changing Colorbar Limits Dynamically
import numpy as np
import matplotlib.pyplot as plt

# Generate sample data
data = np.random.randn(10, 10)

# Create a scatter plot with colorbar, Modify colorbar limits
scatter = plt.scatter(range(100), range(100), c=data, vmin=-1, vmax=1)

# Add a colorbar
cbar = plt.colorbar(scatter)

# Show initial plot
plt.show()

# Redraw the plot
plt.draw()

# Show the updated plot
plt.show()
Output:
In this example, we generate random data, create a scatter plot with a colorbar, and initially display the plot. By calling set_clim after showing the plot and then redrawing it, we can dynamically change the limits of the colorbar to -1 and 1.
Example 6: Resetting Colorbar Limits
import numpy as np
import matplotlib.pyplot as plt

# Generate sample data
data = np.random.randn(10, 10)

# Create a scatter plot with colorbar
scatter = plt.scatter(range(100), range(100), c=data, vmin=0.2, vmax=0.8)

# Add a colorbar
cbar = plt.colorbar(scatter)

# Reset colorbar limits
scatter.set_clim(0.2, 0.8)

# Show the plot
plt.show()
Output:
In this example, we set custom colorbar limits using set_clim. However, by calling set_clim without any arguments, we reset the limits to the default behavior, spanning the full range of the data.
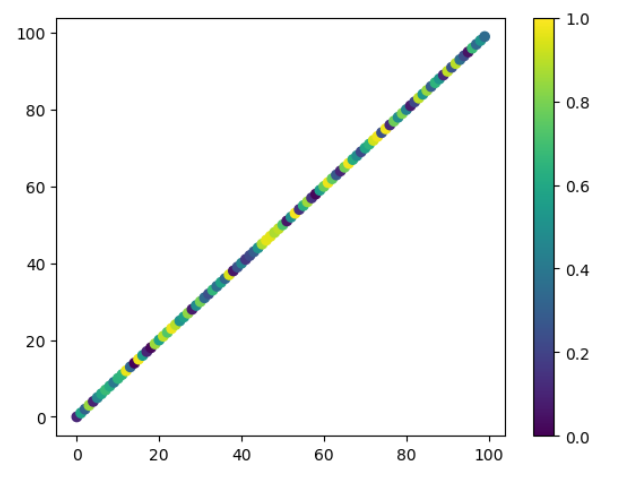
Example 7: Adjusting Colorbar Width
import numpy as np
import matplotlib.pyplot as plt

# Generate sample data
data = np.random.rand(10, 10)

# Create a scatter plot with colorbar, Set custom colorbar limits
scatter = plt.scatter(range(100), range(100), c=data, vmin=0, vmax=1)

# Add a colorbar
cbar = plt.colorbar(scatter, fraction=0.05, pad=0.05)

# Show the plot
plt.show()
Output:
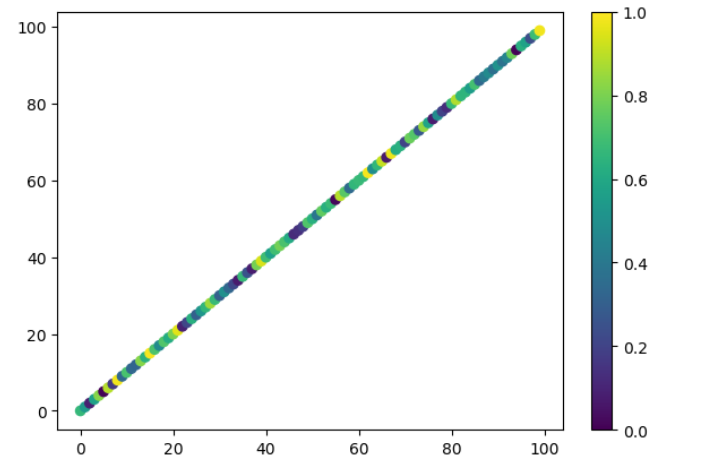
In this example, we generate random data, create a scatter plot, and add a colorbar. By adjusting the fraction and pad parameters of the colorbar function, we can control the width and position of the colorbar in relation to the plot.
Example 8: Setting Colorbar Title
import numpy as np
import matplotlib.pyplot as plt

# Generate sample data
data = np.random.rand(10, 10)

# Create a scatter plot with colorbar
scatter = plt.scatter(range(100), range(100), c=data)

# Add a colorbar with a title
cbar = plt.colorbar(scatter)
cbar.set_label('Values')

# Show the plot
plt.show()
Output:
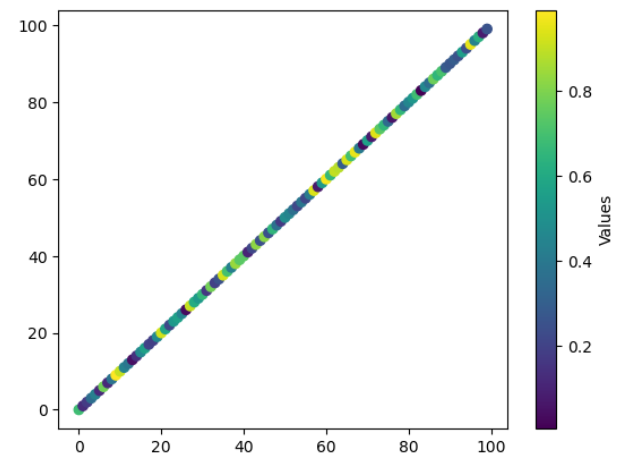
In this example, we generate random data, create a scatter plot, and add a colorbar. By calling set_label on the colorbar object, we set a title for the colorbar, providing additional information about the values it represents.
Example 9: Modifying Tick Labels
import numpy as np
import matplotlib.pyplot as plt

# Generate sample data
data = np.random.rand(10, 10)

# Create a scatter plot with colorbar, Set custom colorbar limits
scatter = plt.scatter(range(100), range(100), c=data, vmin=0, vmax=1)

# Add a colorbar
cbar = plt.colorbar(scatter)

# Modify tick labels
cbar.set_ticks([0, 0.2, 0.4, 0.6, 0.8, 1])
cbar.set_ticklabels(['Low', '0.2', '0.4', '0.6', '0.8', 'High'])

# Show the plot
plt.show()
Output:
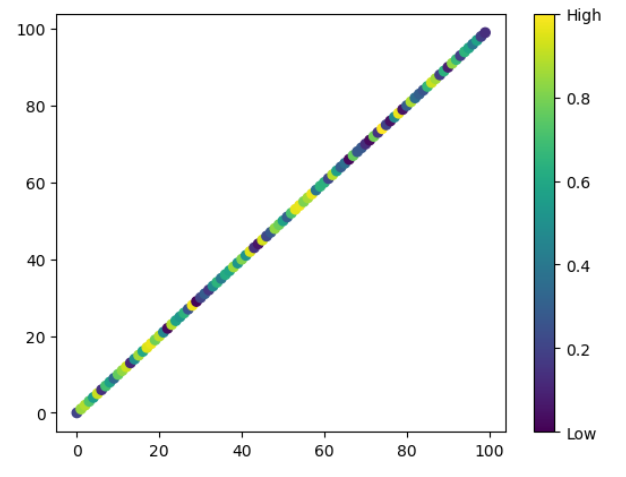
In this example, we generate random data, create a scatter plot, and add a colorbar. By using set_ticks and set_ticklabels on the colorbar object, we modify the tick positions and labels, providing a more descriptive representation of the colorbar values.
Example 10: Changing Colorbar Colormap
import numpy as np
import matplotlib.pyplot as plt

# Generate sample data
data = np.random.rand(10, 10)

# Create a scatter plot with colorbar, Set custom colorbar limits
scatter = plt.scatter(range(100), range(100), c=data, vmin=0, vmax=1)

# Add a colorbar with a different colormap
cbar = plt.colorbar(scatter, cmap='hot')

# Show the plot
plt.show()
Output:
In this example, we generate random data, create a scatter plot, and add a colorbar. By specifying a different colormap using the cmap parameter of the colorbar function, we change the color scheme of the colorbar to the ‘hot’ colormap.
Matplotlib colorbar limits Conclusion
Adjusting the limits of a colorbar in Matplotlib allows us to control which values are represented and how they are visualized in our plots. By using the set_clim method of the colorbar object, we can set custom limits, adjust for logarithmic scales, and dynamically modify the colorbar range.
In this article, we explored various code examples that demonstrated how to set colorbar limits, use symmetric limits, adjust for log scales, change tick labels, modify the width, set a title, and change the colormap of a colorbar.